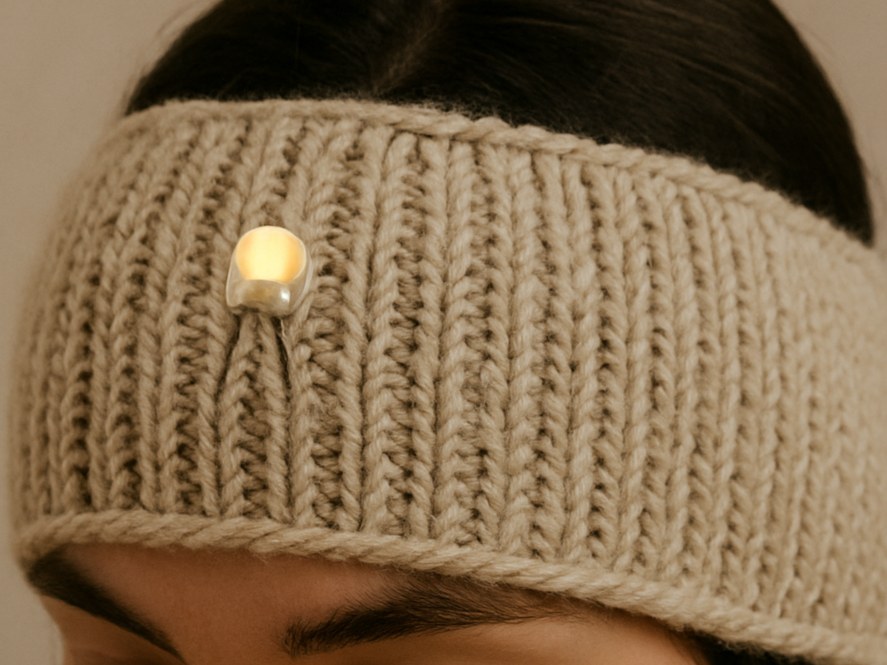
Knitting with Conductive Yarn – DIY LED Headband Project

When tech meets textiles, something magical happens – especially when it's wearable and handmade!
Conductive yarn allows you to integrate lights and circuits directly into your knitting – no wires, no soldering. In this post, I'll walk you through how to create a knitted headband with built-in LED lighting – stylish, safe, and super fun to make.
No tech degree required – just your knitting needles and a spark of curiosity! 😉
🔍 What Is Conductive Yarn?
Conductive yarn is a specialty fiber that can carry electrical current.
It's usually made from a base like cotton, polyester, or nylon that's coated or spun with stainless steel or silver.
It allows you to create circuits directly within your textile – perfect for soft electronics, wearables, or light-up accessories.
🧵 What You'll Need
Conductive yarn (e.g. Silvertech, Shieldex, SparkFun)
-
Main knitting yarn (e.g. cotton or merino, depending on LED voltage)
-
LED lights (3mm or 5mm work best)
-
Coin cell battery (CR2032) + holder
-
Textile glue or insulating tape
-
Circular knitting needle (e.g. 4.0 mm)
-
Yarn needle, scissors, optional multimeter
🧠 Safety First
Use only low voltage (e.g. 3V coin cells) – no wall plugs!
-
LEDs don't get hot, but keep a safe distance from skin
-
Avoid metal-to-skin contact; isolate conductive parts
-
Keep + and – paths separate – they must never touch
-
Test the setup on the table before installing it in your knitwear
🧶 Project Idea: LED Headband (Wearable Tech)
✨ Size:
Approx. 48–52 cm circumference, 8–10 cm height (stretchy)
📦 You'll Need:
-
~40 g of main yarn
-
~2 m of conductive yarn
-
1–2 small LEDs
-
1 coin cell + holder
-
Optional lining
-
Needle, scissors, textile glue
🪡 Step-by-Step Instructions
1. Knit the Basic Headband
-
Cast on 80 stitches (adjust for size)
-
Work in rib pattern (e.g. k2, p2) for 8–10 cm
-
Either join in the round or knit flat and seam later
👉 Tip: Plan LED placement at the forehead or side
2. Add the Conductive Circuit
Knit or sew two separate lines of conductive yarn – one for positive, one for negative.
-
Start from where the battery holder will be placed
-
Extend each "wire" to the LED position
-
Ensure the lines never touch!
Use the wrong side of the work or inner channel to hide the paths.
3. Attach the LED & Battery
-
Place the LED at the planned spot
-
Use conductive yarn to attach each leg to the respective paths
-
Connect the coin cell holder at the other end (positive/negative)
👉 Test with the battery before securing everything.
4. Secure & Finish
-
Use textile glue or insulating tape to protect connections
-
Add a soft fabric lining if needed
-
Seam the band (if flat-knit) and weave in ends
-
Insert battery – and let it shine!
✨ My Takeaway
Knitting with conductive yarn is an exciting step into the world of DIY electronics and creative tech. Whether for visibility on night walks or just a glowing fashion statement – this project proves:
You can make smart wearables with simple materials and a little curiosity.
Get ready to light up your knitting world – stitch by stitch, spark by spark!
👋 Have you ever tried knitting with electronics?
Show off your creations or ask your questions in our Facebook Group – I'd love to see your brilliant ideas!
#conductiveyarn #knitwearables #ledknitting #techknit #strickenimtrend
Be creative but pay attention to "Safety First"!
Yours,
Kathrin ☀️🧶
Want to dive deeper into the world of stitches?
Explore my patterns, browse the blog, or join our community!
